Without a pipeline, you're guessing. You follow up with the wrong leads, forget about the right ones, and have zero visibility into whether you'll hit your number this month. A well-built pipeline fixes all of that. It turns your sales process from a chaotic list of names into a structured workflow that your entire team can follow.
This guide walks you through building a sales pipeline from scratch, step by step. You'll learn how to define your stages, qualify your leads, and set up a process that actually scales. We'll also show you how tools like Vedain CRM make each step easier, from tracking deals on a visual Kanban board to automating follow-ups with no-code workflows, so you can spend less time managing your pipeline and more time closing.
What a sales pipeline is and what you need first
A sales pipeline is a visual representation of where every active deal sits in your sales process. Each deal occupies a stage, and each stage has a defined set of actions that move a prospect closer to a purchase. When you learn how to build a sales pipeline, you're essentially building a repeatable map your team can use to move deals forward without relying on memory or guesswork.
What a sales pipeline actually is
Think of your pipeline as a series of clearly labeled buckets. Each bucket represents a stage, such as "Prospecting," "Qualified," "Demo Scheduled," or "Proposal Sent." Every deal you're working lives in exactly one bucket at any given time, and a deal only moves to the next bucket when it meets a specific condition. This structure gives you real-time visibility into how much revenue is potentially in play, where deals are stalling, and which reps need support.
A pipeline is only useful if every stage reflects a real action that happened, not just a feeling about where a prospect stands.
A healthy pipeline shows deals spread across multiple stages, with new opportunities entering at the top and closed deals exiting at the bottom. A broken pipeline looks like a traffic jam, where deals pile up in one stage, no one follows up, and the "close date" fields are all months past due. Knowing the difference early saves you from building the wrong system.
How a pipeline differs from a sales funnel
People use these terms interchangeably, but they describe two different things. A sales funnel is a marketing concept. It describes how a large pool of prospects narrows down to a smaller group of buyers at each stage of awareness, from "never heard of you" to "ready to buy." A sales pipeline, by contrast, tracks specific, named deals and the concrete actions your sales team takes to close them. Your funnel feeds your pipeline. They work together, but treating them as identical leads to messy data and unclear ownership.
What you need before you start building
Before you add a single stage or enter a single lead, you need three things in place. Skipping these will give you a pipeline that looks organized but produces no useful information.
- •A defined sales process: You need to know the steps your team actually takes to close a deal. Even a rough draft works. Without this, your stages will be arbitrary and inconsistent across reps.
- •A CRM or tracking system: A spreadsheet can get you started, but a purpose-built CRM like Vedain lets you build your pipeline visually, assign deal owners, and automate follow-up tasks from day one at a flat $10 per user per month.
- •Agreement on what counts as a qualified lead: If your team disagrees on this definition, you'll fill your pipeline with noise. Set a basic standard before you import any contacts.
With those three elements in place, you have the foundation to build a pipeline that generates accurate forecasts and drives consistent revenue.
Step 1. Define your ICP, offer, and revenue target
Before you build a single stage in your pipeline, you need to know who you're selling to, what you're selling, and how much revenue you need to generate. Skipping this step fills your pipeline with the wrong leads, wastes your team's time, and distorts your forecast. Every other part of how to build a sales pipeline depends on getting these three inputs right from the start.
Identify your ideal customer profile
Your ideal customer profile (ICP) is a specific description of the type of company or person most likely to buy from you and stay a customer. It's not a vague demographic. Define it in concrete terms so your reps can qualify any new lead in under five minutes.
Use these criteria to build your ICP:
- •Industry: Which sectors do your best current customers come from?
- •Company size: How many employees or what revenue range do they typically have?
- •Buyer role: Who is the decision-maker your reps need to reach?
- •Core problem: What specific pain drives them to look for a solution like yours?
- •Budget signal: Can they realistically afford what you sell?
If you can't describe your ICP in three sentences, you're not ready to fill your pipeline with leads.
Clarify your offer and calculate your deal math
Your offer needs to be specific enough that any rep on your team can explain it in one sentence. Vague offers lead to long, unproductive sales conversations where prospects never fully understand what they're buying or why it costs what it costs. Write a one-sentence version and test it by reading it to someone who knows nothing about your product.
Once your offer is clear, run the numbers. Decide how much revenue you need this quarter, then work backward. If your average deal size is $2,400 and you want to close $24,000, you need 10 won deals. If your close rate is 25%, you need 40 qualified opportunities active in your pipeline at any time. This deal math tells you exactly how many leads to generate each month and how aggressively to qualify them, which directly shapes every stage you build next.
Step 2. Map pipeline stages and set exit criteria
Knowing how to build a sales pipeline means more than picking stage names. Each stage needs to represent a real, verifiable action that has already happened, not a gut feeling. When your reps move a deal forward based on evidence rather than optimism, your pipeline becomes a reliable forecast tool instead of a wishful list.
Choose your pipeline stages
Your stages should reflect the actual steps in your sales process, not a generic template someone copied from a blog post. A straightforward B2B pipeline typically uses five to seven stages, which gives you enough visibility without creating unnecessary complexity for your reps. Too many stages and deals stall; too few stages and you lose the ability to spot where your process breaks down.
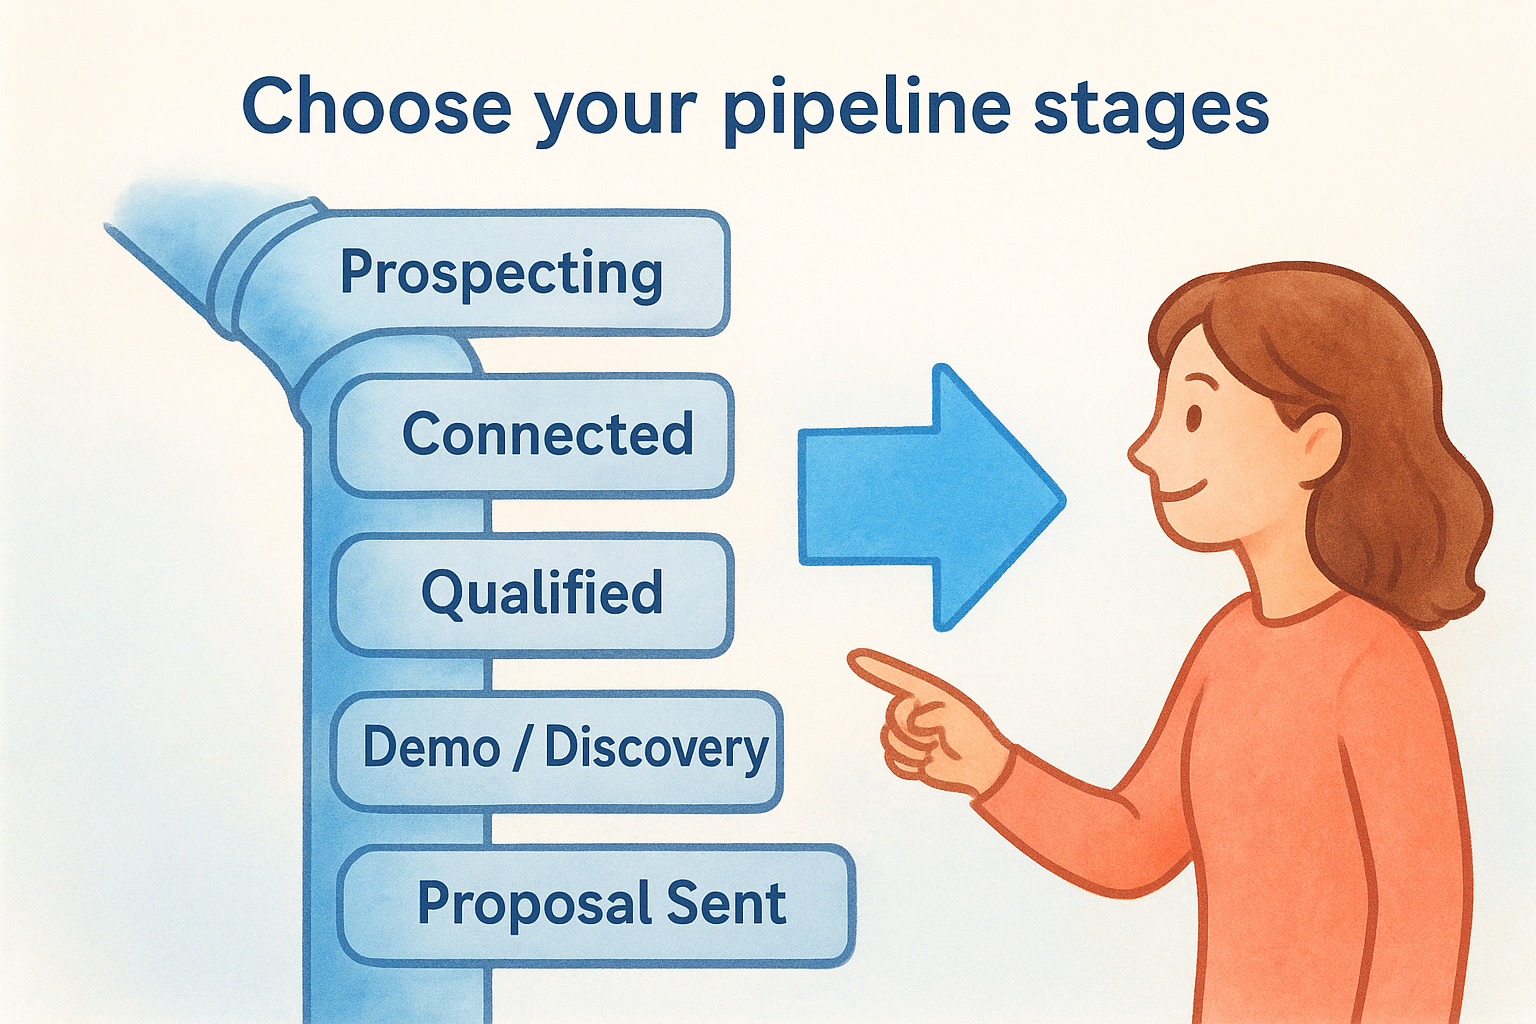
Here is a standard starting template you can adapt:
Adjust these labels to match your team's language and your buyers' actual behavior. If your process skips a formal demo, remove that stage entirely. If contracts require a legal review, add it as its own stage so deals don't disappear between proposal and close.
Set exit criteria for each stage
Exit criteria are the specific conditions a deal must meet before your rep moves it forward. Without them, reps interpret stage names differently and your pipeline data becomes noise instead of a reliable signal.
The goal of exit criteria is to make pipeline progression a fact, not an opinion.
For each stage, write one or two conditions that must be confirmed before a deal advances. A deal moves from "Connected" to "Qualified" only when the rep has verified budget, authority, and a real problem in a live conversation. A deal moves from "Proposal Sent" to "Negotiation" only when the buyer acknowledges receipt and commits to a review timeline. These rules keep your pipeline honest and your weekly forecasts accurate.
Step 3. Build lead flow and qualify fast
A pipeline with no leads entering at the top is just an empty spreadsheet. Once you've mapped your stages and set exit criteria, the next step in how to build a sales pipeline is creating a consistent source of new leads and a fast way to decide which ones deserve your team's time. Without both, your pipeline fills with the wrong opportunities or dries up entirely.
Choose your lead sources
Your lead sources should match where your ICP actually spends time. Chasing channels that don't align with your buyers wastes budget and produces low-quality contacts that clog your pipeline stages without ever converting.
Pick two or three sources and commit to them before adding more. Common options include:
- •Outbound prospecting: Your reps identify and contact prospects directly via cold email, phone, or LinkedIn outreach.
- •Inbound content: Blog posts, landing pages, or lead forms capture buyers who are already researching a solution.
- •Referrals: Existing customers introduce you to qualified buyers, often with shorter sales cycles.
- •Paid advertising: Search or social ads drive targeted traffic to conversion-focused landing pages.
Spreading across five lead sources with no focus produces five mediocre pipelines instead of one strong one.
Qualify leads with a fast framework
Not every lead deserves a full discovery call. Qualifying fast means applying a consistent filter before your reps invest significant time in any prospect. The most widely used framework is BANT: Budget, Authority, Need, and Timeline. You don't need a formal scoring system, but every rep should be able to answer all four points after an initial conversation.
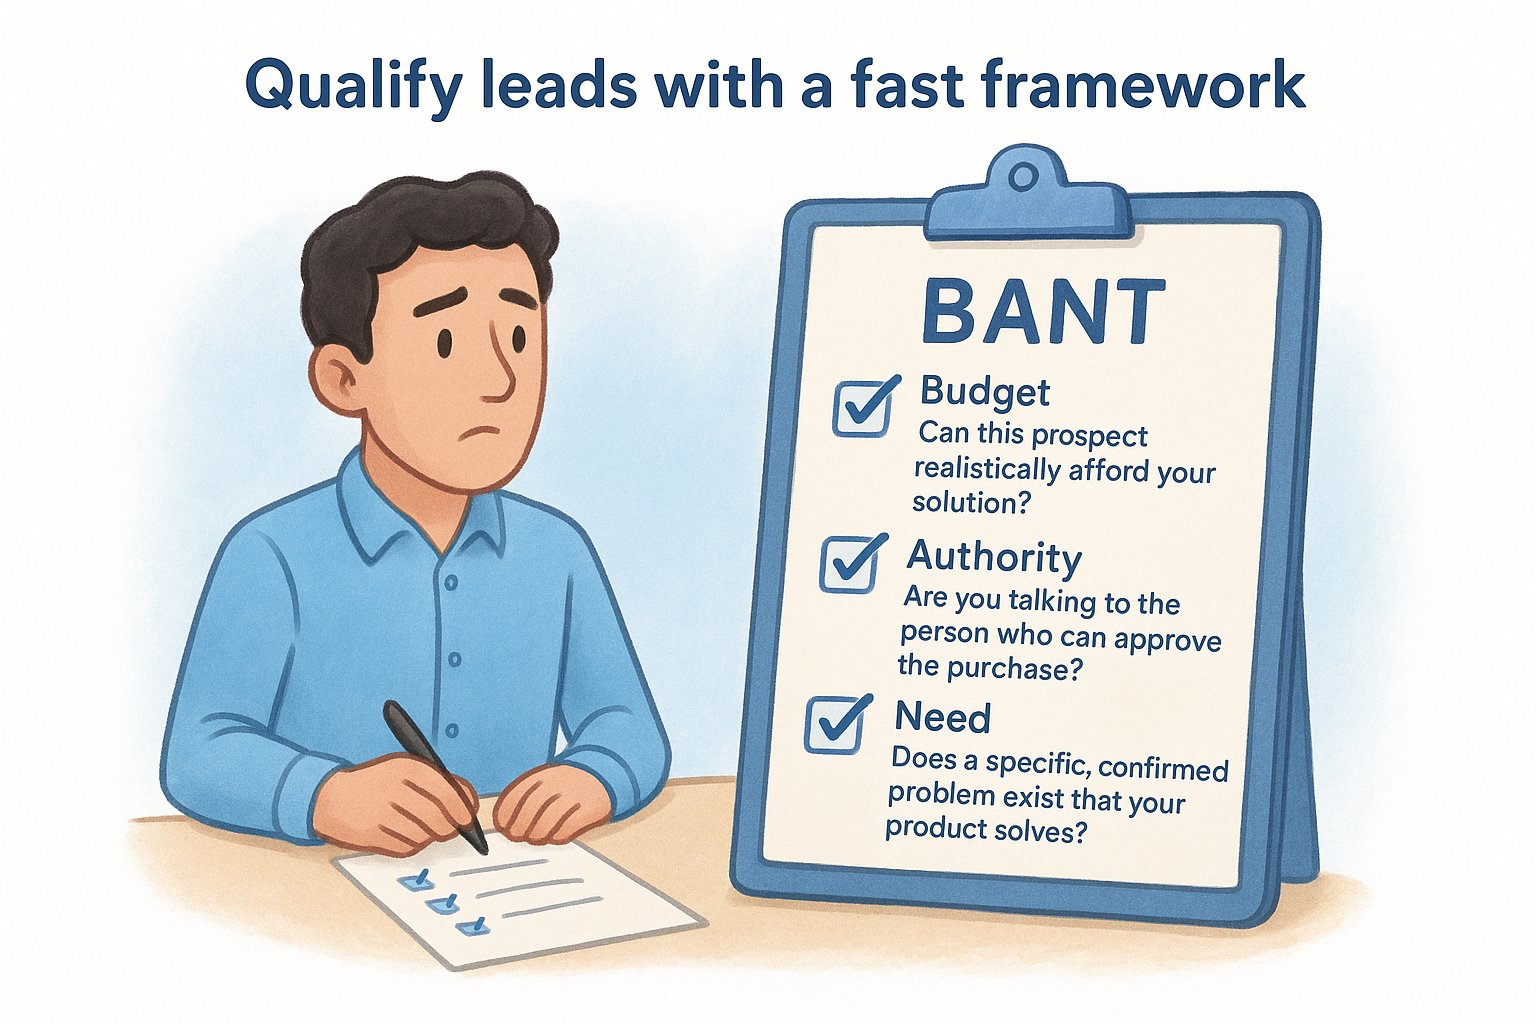
Use this checklist to qualify any inbound or outbound lead before moving it past the "Connected" stage:
Any lead that fails two or more of these criteria should exit your pipeline immediately or move to a long-term nurture list. Keeping weak leads active pollutes your forecast and misleads your entire team about the revenue you can realistically close this quarter.
Step 4. Set up tracking, fields, and automation
Once your stages and lead flow are running, the next part of how to build a sales pipeline that actually produces reliable data is configuring your CRM correctly. The fields you track and the automations you set up determine whether your pipeline gives you actionable information or just a list of names with no context.
Choose the right custom fields
Your CRM comes with default fields, but those rarely match your actual sales process. Add custom fields that capture the information your reps need to qualify, forecast, and close deals. Keep the list short. Every field you add is a field your reps must fill in, and a long form creates friction that leads to incomplete records.
Here are the core fields worth adding to every deal record:
A deal record with no next action assigned is a deal that will stall.
Automate the repetitive tasks
Manual follow-up reminders and data entry are the two biggest time drains in any sales process. Use your CRM's automation tools to eliminate both. When a deal moves to "Proposal Sent," trigger an automatic task that reminds the rep to follow up in three days. When a new lead hits a specific stage, auto-assign it to the right rep based on territory or deal size.
Start with three automations before adding more:
- •Stage-based task creation: Create a follow-up task automatically when a deal advances to any new stage.
- •Inactivity alerts: Flag any deal that has not moved in seven days so managers can review it during pipeline calls.
- •Lead assignment rules: Route new leads to the correct rep the moment they enter the pipeline, removing manual handoffs entirely.
Step 5. Manage the pipeline with weekly reviews and metrics
Building a pipeline is only half the work. The final step in how to build a sales pipeline that produces consistent revenue is reviewing it on a regular cadence and tracking the right numbers. Without a review process, deals stall, reps lose focus, and your forecast drifts further from reality every week.
Run a structured weekly pipeline review
A weekly pipeline review is a focused, time-boxed meeting between a sales manager and each rep, or the full team if you're small. The goal is not to celebrate wins. The goal is to identify stuck deals, missing next actions, and opportunities that need to be closed or removed before they distort your forecast. Keep the meeting under 30 minutes by reviewing only deals in active stages, not leads that haven't been qualified yet.
A pipeline review that covers every single contact is a waste of time; focus only on deals with a realistic close date within the next 60 days.
Use this agenda template to run every weekly review consistently:
Track the metrics that matter
Most teams track too many numbers and act on none of them. Pick four core pipeline metrics and review them every week so you can spot problems before they affect your close rate.
- •Pipeline velocity: How fast deals move from first contact to closed won
- •Stage conversion rate: The percentage of deals that advance from one stage to the next
- •Average deal size: The mean value of all active opportunities in your pipeline
- •Win rate: The percentage of qualified deals your team ultimately closes
These four metrics tell you where your process breaks down and where your reps need coaching. If your stage conversion from "Demo" to "Proposal Sent" drops below 50%, your demos aren't landing. If your win rate falls while average deal size rises, your reps may be targeting prospects outside your ICP. The numbers give you a clear signal; your weekly review gives you the moment to act on them.
Next steps to keep your pipeline healthy
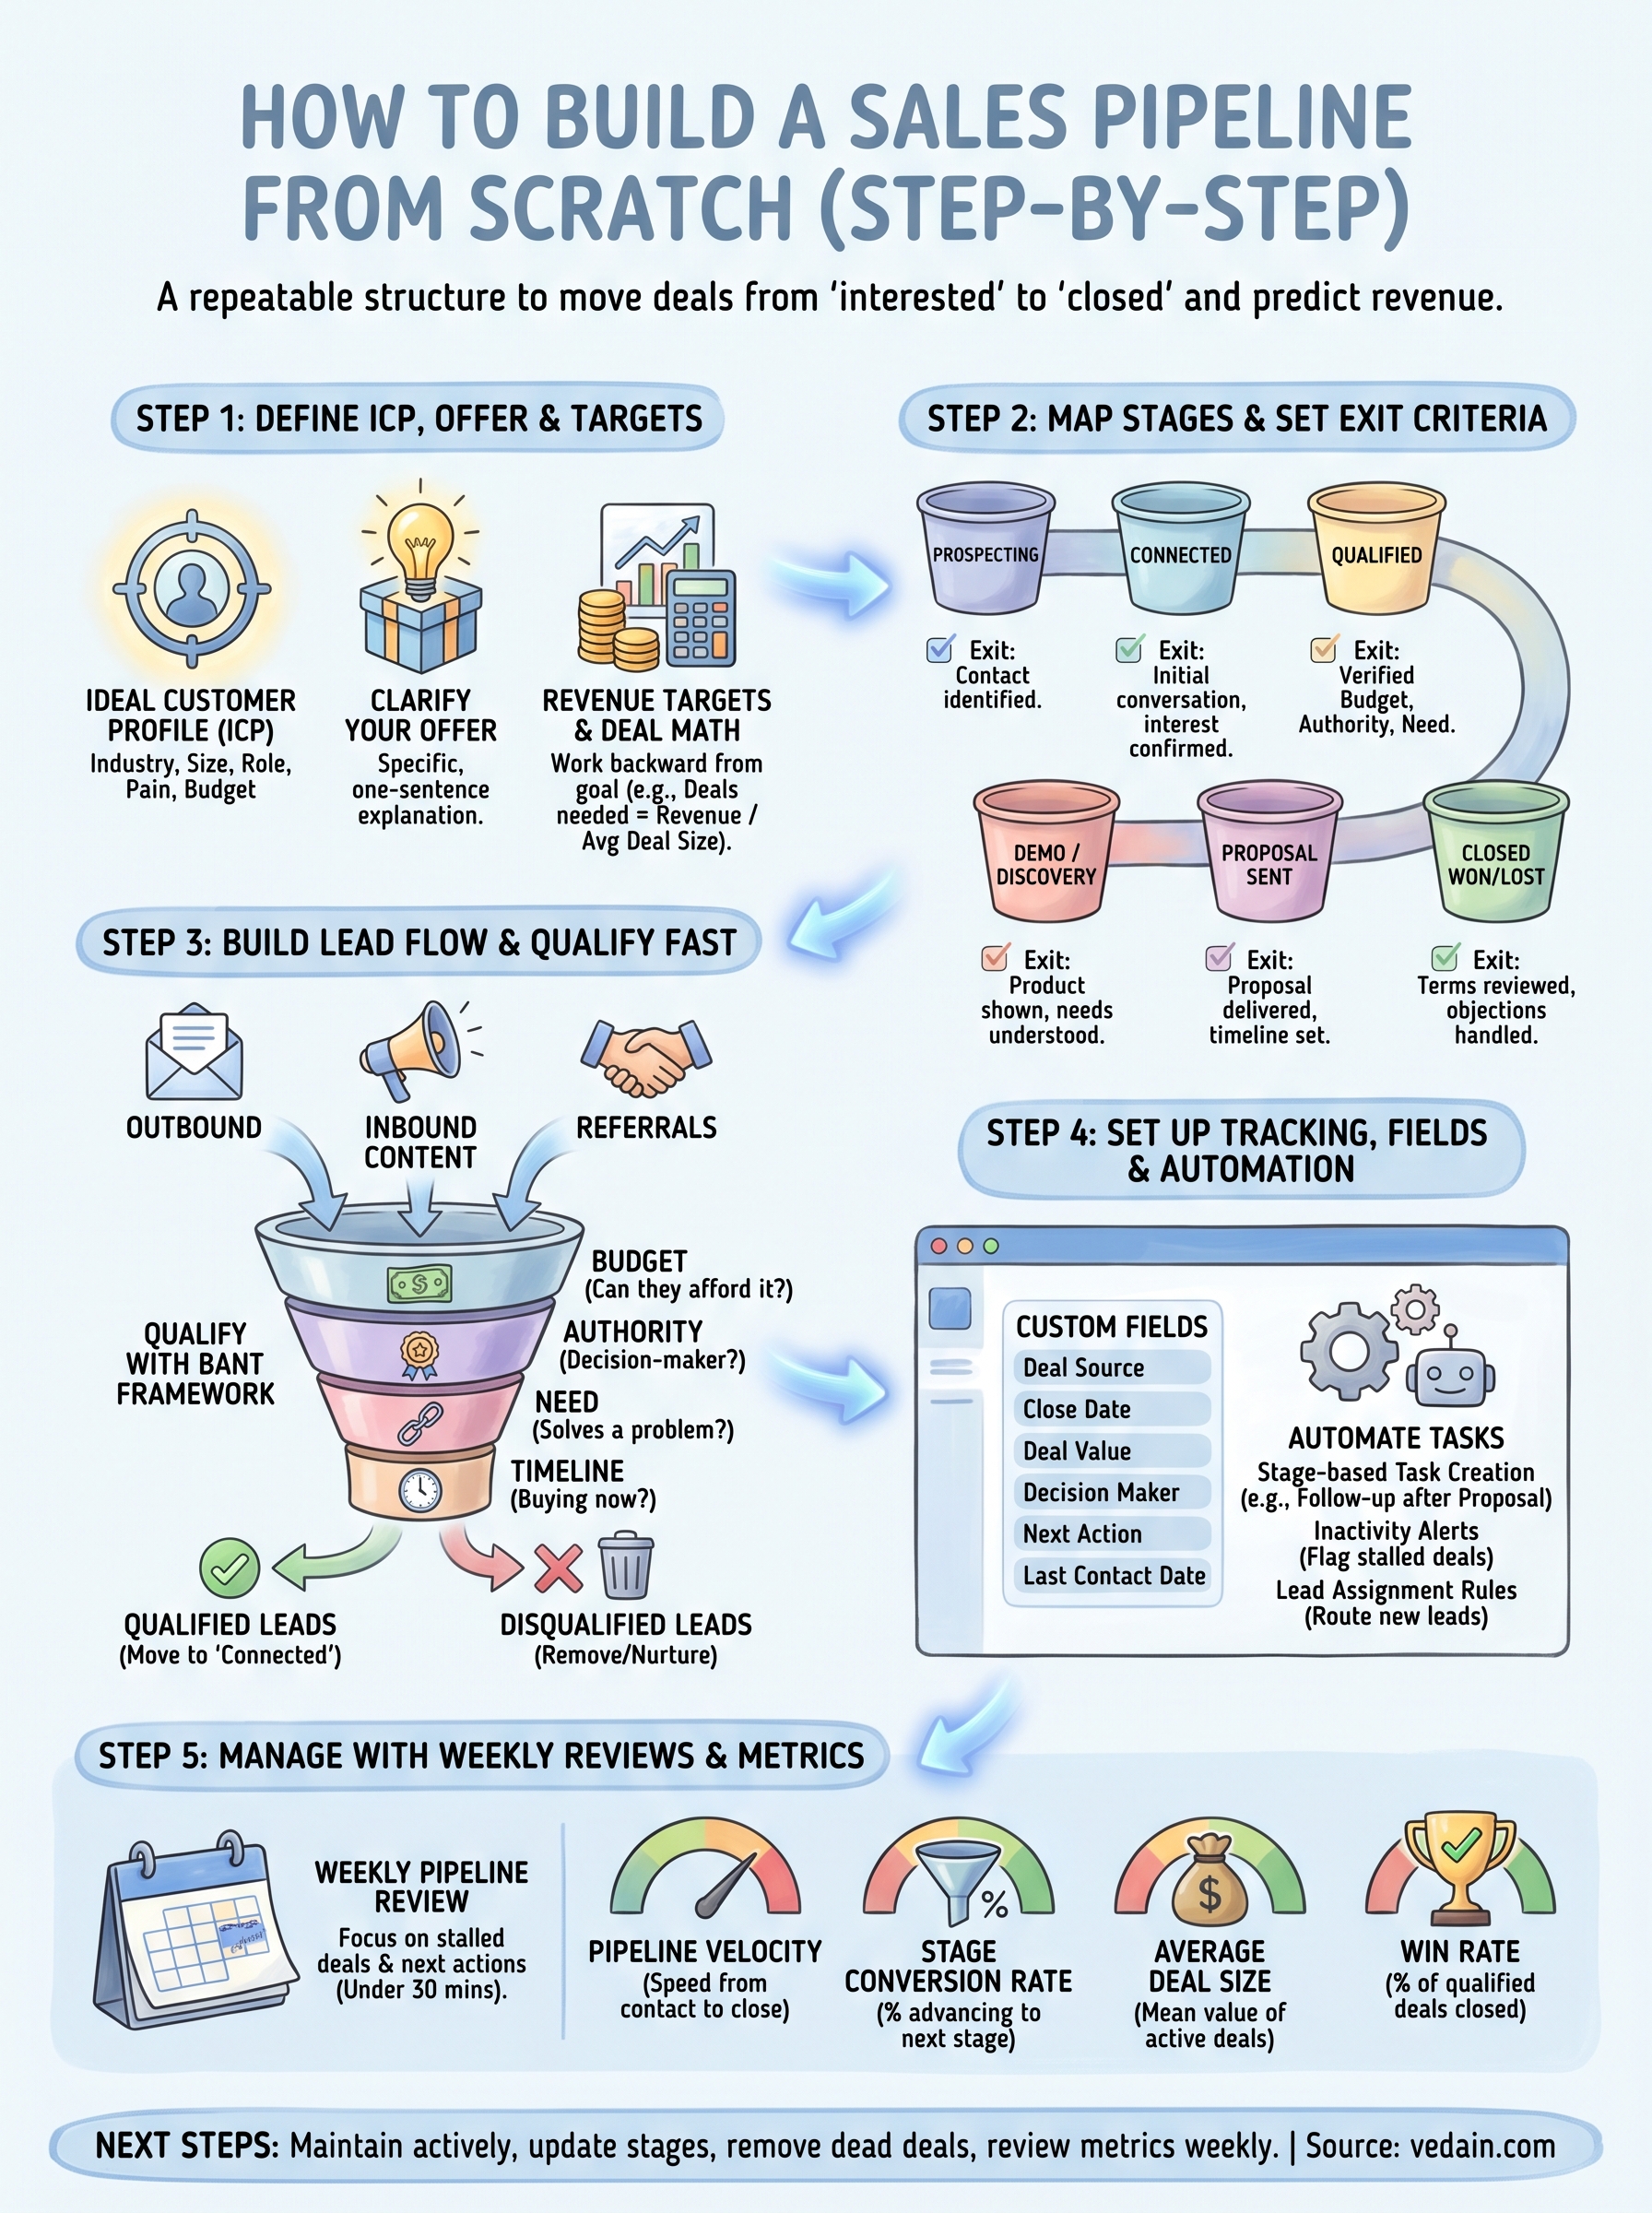
You now have a complete framework for how to build a sales pipeline that generates predictable revenue. The five steps in this guide give you everything you need to move deals forward with confidence instead of guessing. A pipeline stays healthy only when you maintain it actively, which means updating deal stages based on real actions, removing dead deals without delay, and reviewing your four core metrics every single week without skipping.
Start small. Pick two or three lead sources, configure your stages with clear exit criteria, and run your first pipeline review by Friday. Adjust what is not working and build on what is. As your process matures, add automation and custom fields to reduce manual work and keep your data clean. If you want a CRM that makes every step faster, try Vedain CRM free and have your first pipeline live in under five minutes with no credit card required.